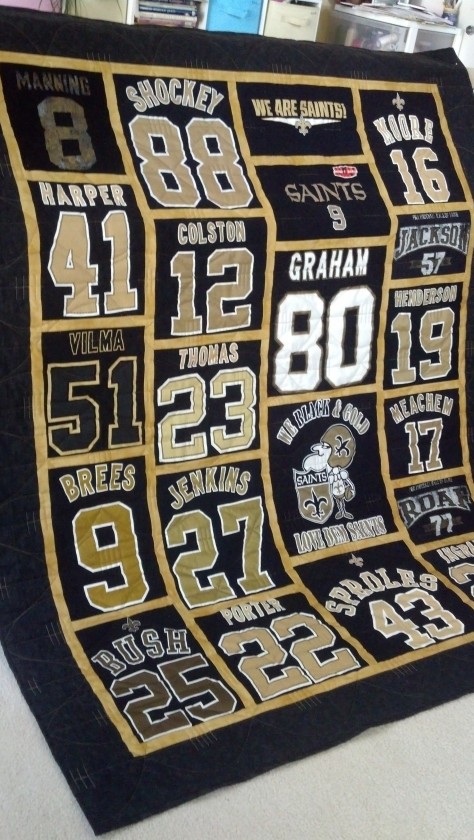
NO Saints SB Tshirt quilt, quilted with footballs
I guess the reason I feel the need to cover this topic over and again is because well, it’s important. People collect t-shirts from concerts/places/life events/football teams that are important to them. T-shirts cost money, AND usually represent great memories, accomplishments or something important to the owner. Well, quilts ALSO cost money, and if they cost a lot, they are very likely made with care and love, integrity and professionalism. So in essence I feel like by me (an expert on this topic) informing you (the reader) about details to consider, I am helping you to protect your investment.
OK, before I get to the meat of the topic, I just have one more thing to say: IF YOU ARE TRYING TO MAKE A TSHIRT QUILT FROM PINTEREST, STOP NOW!!! I’m sorry if that sounds rude, and I’m not trying to be mean; I’m just trying to save you from spending exponentially more money when you have to take your work-in-progress to someone who knows what they’re doing to fix it for you. And I say this from being that person that fixed some pretty difficult works-in-progress.
Well, one more thing: you pay for what you get. I don’t see the website up anymore, but there was a local person a few years ago charging $75 for t-shirt quilts, and they were HORRENDOUS. Not only were they ugly and poorly constructed, but the ‘quilting’ was so sparse that the batting would have begun to fall apart within a few washes.
OK here we go:
1. INSIST on seeing examples of their work. Here’s what to look for:
- Does the quilt maker have one style? If so, that is exactly how you can expect yours to turn out. Inquire if they have more options to offer.
- Are the panels of the t-shirts cut so that some of the words/picture is missing? Is that what YOU want?
- Can you see the quilting stitches? If not, can you see lines that look wavy (like when a curtain drapes)? That could indicate the stitching is not frequent enough to support the batting. Stitching/ties should be every 4-6″ square with standard (poly, cotton or blend) batting.
- How do the quilts look? Is the maker’s style elegant, country chic or throw it all in the pot and stir? Elaborate quilts can be made from t-shirts, but usually a more extensive pattern will call for a higher cost. So if that’s what you want, discuss it with the quilt maker.
- If you have sports jerseys, has this quilt maker worked with them before? I can say they are generally more difficult due to the weight, slickness of fabric and stickiness of the logo, and experience is very helpful. Same goes for silk shirts, neckties and crown bags.
If they have examples on hand to show you, that’s even better.
2. Ask them what kind of stabilizer they use. I use that phrase because using stabilizer is NOT an option, it is required. I tell you this as a t-shirt quilt maker AND as a long arm quilter. When it comes time to quilt the layers of your project together, if the shirts are not stabilized, they will stretch and pull, and you will end up with puckers and wrinkles in your quilt or a quilt that is not squared up, and that just does not look good.
I’ve had a regular customer ask me about this, because she was making one and didn’t want it to be so heavy. There are very lightweight stabilizers that can keep the weight down, and a lighter weight batting can be used as well, if that is a concern.
3. Ask them WHERE they purchase their fabric. YES there is a difference in quality. If they give the name of a local quilt shop or start rambling on about this great online store they found, you’re probably safe. Joann’s even has ok fabric. But if they buy at Walmart, Hobby Lobby, Hancock’s or even Michaels, then ask to see some samples of fabric they would use in your quilt. If it’s rough, that means it is not as tight of a weave, which means it may shrink more or unevenly, the dye may fade quicker, and that fabric will likely have holes in it in fewer washes.
4. Ask about their process. How do they go from t-shirt to quilt? How do they decide what shirts go where (this question can ensure all your red shirts do not end up in one column)? Do they quilt it on their regular sewing machine, on a long arm machine or do they have someone else quilt it for them for you (could increase the cost)?
On this note, different quilt makers have different pricing strategies and go-to styles. I charge by the size and generally (unless otherwise requested) cut the panels to different sizes to fit in as many as possible, with sashing and a border. One of my esteemed fellow quilt makers charges by the shirt ($28 per), and she uses 2″ squares in various colors to essentially border the shirts or provide spacing, and then a border. It’s ok to call around and ask about these things – you might find the perfect match to your style by doing a little extra research!

memory quilt with tshirt panels
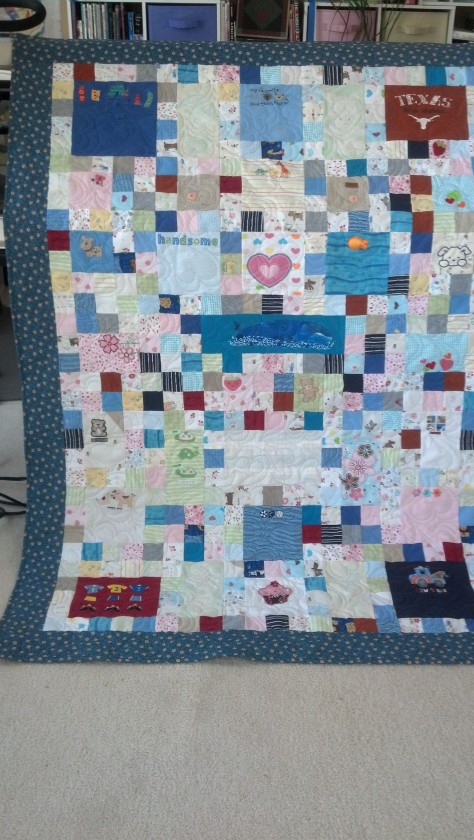
Baby clothing quilt with panels and 2″ squares
5. Ask how they finish the quilt. Borders make a great frame for quilts. It also allows for the edge of the front to tie in color-wise to the back of the quilt. And it provides a no-stretch surface for the quilt maker to bind the top and back together.
- If they do a knife edge finish, that means they put the whole thing together, sew three edge sides together, flip it right side out, sew the last side and then quilt or tie it. This can lead to batting getting loose inside the quilt (by not getting sewn into the edges) and less than exemplary quilting.
- If they fold the binding over from front to back or back to front, that will secure the edge but ask to see examples of their work, because this can ALSO lead to a very uneven look and really fat binding.
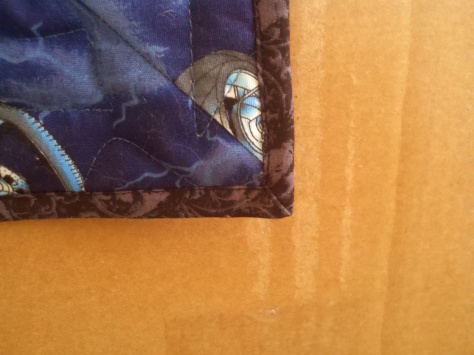
- If they use a double fold applied binding (also called French fold), you will have a very tight, clean edge to your quilt. Especially if they know how to miter their corners.
You should expect to spend between $400-1200 on your quilt, depending on a variety of factors, including number of shirts and desired quilt size. Understand, your quilt maker may be supporting their family and this is their source of income. Their labor is their time and it will cost you. Batting and fabric costs add up as well. I have spent $120 just for the backing fabric on one quilt (the one below)!

king size crown bag quilt
Because you should expect to pay that kind of dollar, you should also expect a result that is on par with that price. But, YOU have a responsibility here too:
1. Ask questions. I have outlined a few above that I don’t think the average non-quilt maker would know to ask. If there is something else you are unsure of, ASK. It’s not a dumb question, it’s smart for you to become educated about your expenditures in advance.
2. Tell him/her what you want! The scariest quilt I have made in recent times happened to be the last one, and what made it so scary is that she told me to just do whatever. As a long arm quilter I LOVE that, but as a quilt maker, I cannot predict what colors she does or doesn’t like, so I just went with what I thought she might like. Fortunately for me, she loved it. I did too, but it could have been a disaster if she didn’t like yellow. Or purple (the back was tie dyed white/purple)!
tshirt quilt
3. They should ask you questions during the initial discussion, like how big you want it to end up (is it for a bed or not), who is it for (male or female, young or older person?), do you want all the shirt blocks to be the same size, specific colors you do or do not want in the quilt, any special deadline or shirt that should be centered…
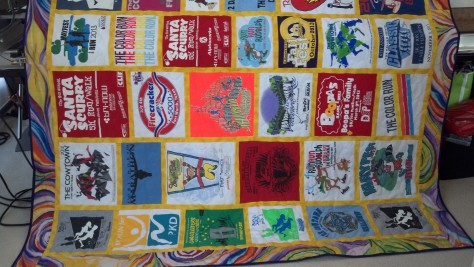
This quilt was made for a graduating son, and the mother was very particular and involved in the entire process. But I got three hugs at the end, so I think she was pretty happy with the result.
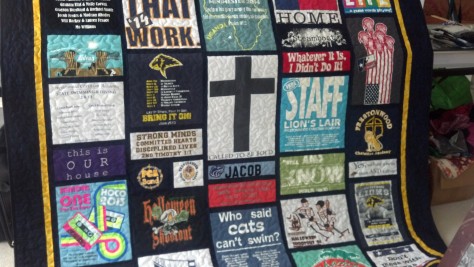
Tshirt quilt with precise instructions from the mom
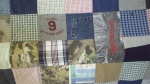
Usually people tell me if it is a memory quilt, which is a great tidbit, because I mostly quilt those in all-over hearts and try to keep the color scheme upbeat. This was a memory quilt with not much to use (sudden loss). Included were t-shirts, a sweatshirt, PJ pants and a watchcap. If your quilter has experience, she’ll make anything work for you :).

This was a memory quilt for a baby lost pre-term. The birthing coach had me make it from onesie’s from the other babies she had birthed.
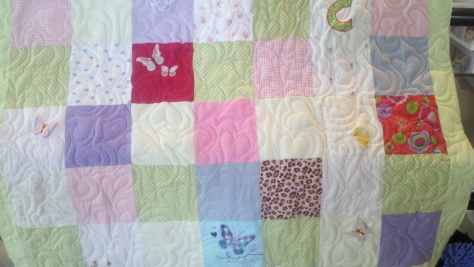
memory quilt from onesies, patchwork style
4. As a quilter and quilt maker, I can tell you that I try to do everything to my best ability. But I’m not the one paying for the quilt and I’m not the one that’s taking it home. You are, so make sure YOU know what you are getting for your money.
If you are unsure, reach out. You can also Google ‘tshirt quilt photos’ and find more than enough fodder to peak your imagination. Best of luck!


")


You must be logged in to post a comment.