Long Arm Quilting – A Professional Perspective

I LOVE my job. Really REALLY love it. That makes it pretty easy for me to wake up every morning keen on what project I get to delve into. That doesn’t mean that every day is a walk in the park. Being a long arm quilter requires a LOT of decision-making considering a wide variety of factors:

1. What does the customer want to spend? Often I will ask the client if they want an all over design or something more custom. Some say they want to keep it inexpensive, which means all over.

all over quilted swirls

all over quilted swirls

Some say they want it for a quilt show, which generally means more $.

very special quilting

very special quilting

I was working on a quilt today that I gave an estimate for at $0.035 per square inch. I charge at least 4 cents when straight lines are involved, so that was not going to happen in this quilt. I had to figure out other designs to work in the spaces instead.

it's coming along

it’s coming along

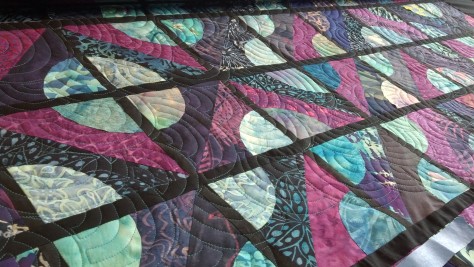
2. What design does the customer want? Some quilt makers have a vision of what they want the outcome to look like, others want the quilter to ‘do what they do best’ (my FAVORITE thing to hear!) One super important consideration is whether the client prefers a more modern look,

modern quilting

modern quilting

or classic/traditional. Some customers like feathers,

curly border feather

curly border feather

others want more graphic quilting for a modern outcome.

straight lines and echo bounce

straight lines and echo bounce

3. What does the fabric say? That is where I often look for inspiration. If there are swirls, curls, flowers or circles on the fabric, those patterns induce me to quilt something similar.

flowers inspired by fabric

flowers inspired by fabric

4. What does the pattern say? This is really important, even with all over designs.

circles translated to Baptist fans

circles translated to Baptist fans

When I receive Quilts Of Valor, they often have star patterns on them. With that type of pattern I quilt in a curvy pattern, so as not to accentuate the sharp angles already present in the pattern.

swirls on stars

swirls on stars

With a custom design, such as today’s project, there are sometimes various blocks that will each be quilted differently. Two things can be exemplified at this point: depth and movement.

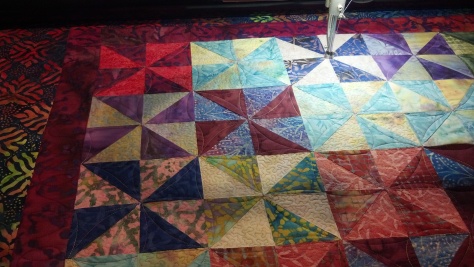
A. Depth – by quilting at different densities (more quilting in one area than another, such as in the photos below), one can create depth in the quilt surface. It gives the flat surface more personality aside from the change in quilting pattern.

pinwheels with depth

pinwheels with depth

depth by quilting

depth by quilting

B. Movement – pinwheels come to mind here, because this block is one that emulates a moving object. So to quilt it in a fashion that simulates movement also adds visual appeal to the quilt. The pinwheels above showcase this as well as those below.

pinwheel movement

pinwheel movement

from below

from below

5. Overall cohesion is INCREDIBLY important to the quilt, and with custom quilts this is where planning comes into play. Using the quilt I was working on today again as the example, I have red triangles inside the quilt as well as along the border. I haven’t quilted either yet because I want them to tie in to one another and haven’t made the final decision as to the design. Also, with the pinwheels (the ‘background’ spokes), I wanted to quilt them more densely than the curls on the forefront spokes, and actually tested out a small meander.

meander vs. wavy lines

meander vs. wavy lines

But it seemed out of place so I removed those stitches and tried the wavy lines, which I felt added the movement in the photo above. I may end up using wavy lines in the red spaces as well.

There can be other factors, such as timeframe (less time = less quilting), anticipated drape (highly quilted quilts are much stiffer), and quilt use intention (I often tell customers they may not want custom quilting on a gift for a 4 year old, it will get washed 100 times and they won’t know the difference).

Regardless of the time it takes to come up with the perfect quilting pattern, it is highly rewarding to reach that light-bulb moment and then find that your conception has become a beautiful reality. Happy quilting my friends!

How to Recover from a Longarm Quilting ‘Mistake’

I have some great mentors in the quilting world. I also take on the opportunity to learn from as many other quilters and quilts that I see at shows, shops and wherever else they pop up.

One mentor told me that as soon as I decided I didn’t like the pattern I was quilting to STOP IMMEDIATELY, because otherwise I would have to do the entire quilt with that pattern, no matter how painful or tedious the experience.

Another mentor told me, if you make a mistake three times while quilting (meaning variation from the pattern you wished to quilt) then it was not a mistake, it was now part of the pattern.

Both of those bits of advice are quite sound, and I’ve learned my lessons, sometimes the hard way. But I am happy to tell you that if you think you want to do a certain stitch in an area and DO change your mind, all hope is not lost.

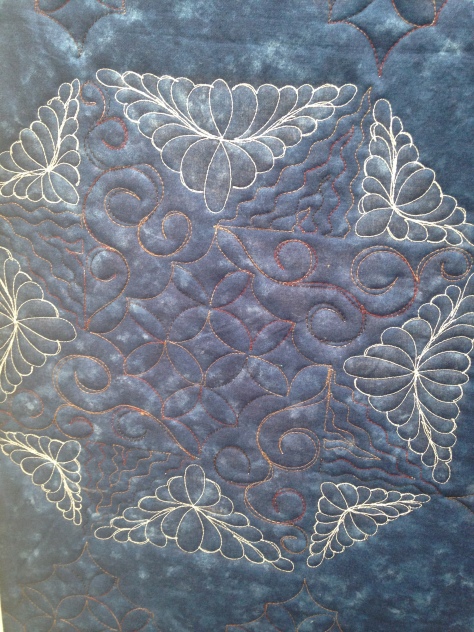
In this particular quilt, I was throwing random feathers into the background, to break up the background quilting and add interest, like in this block below (and around it).

random feathers

random feathers

I had decided to put some within this block. After quilting two feathers in there, I didn’t like the scale, nor that they didn’t look similar enough to belong where I put them. They either needed to be ‘same’y or totally intentionally random, and they were neither. I realized they needed to be removed and the space refilled with the background cover.

So began Operation Unsew:

starting to pull threads

starting to pull threads

This can be tricky, ESPECIALLY if the thread very closely matches the background fabric. If your tension is off, sometimes you can clip a thread (usually underneath the quilt) and remove a long string all at once. But when your tension is good, you have to move very carefully and slowly.

mostly done

mostly done

Bit by bit I clipped a thread and used my sharp, small, curved embroidery scissors to pick the thread out from the lock it had with the bobbin thread. When I can, I clip the bobbin thread and the top thread pulls out a bit easier for a short distance. Those start/stop points are the worst!

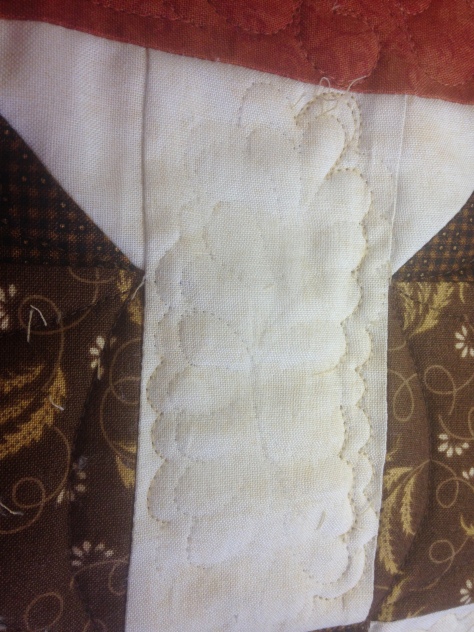
thread out, shadow remains

thread out, shadow remains

Finally having all the thread out, we have what remains above. Perhaps a mere shadow of what once was, I needed it to be a disappearing act from what it once was!

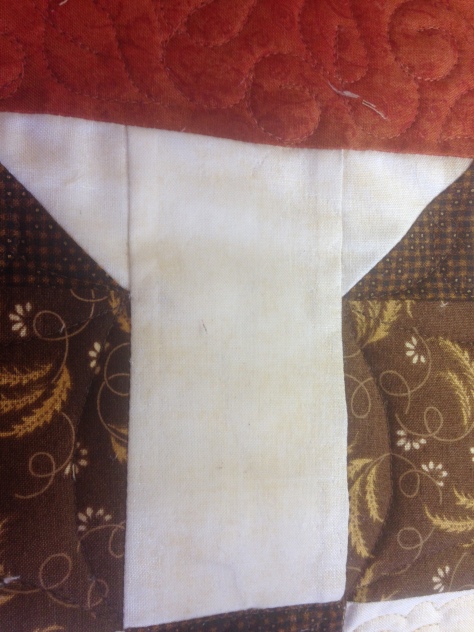
Tada!!!

clean slate!

clean slate!

The trick? I use a spray bottle with ONLY water in it, give it a light spray, wipe my clean hand gently over the fabric and then give it 5 minutes to dry out. I’ve done this more than once and not had problems with color bleed, but I cannot guarantee to you that it will not occur. So be VERY careful if you need to use this method on fabrics you worry will bleed.

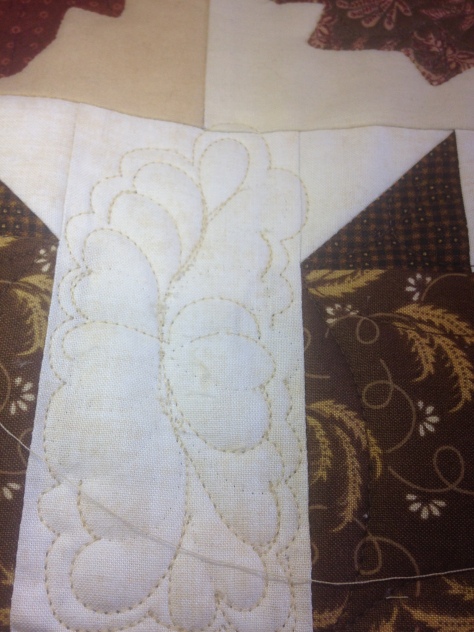
In the end, I was able to requilt the area and I can’t even tell where the previous stitches were. 🙂

corrected block

corrected block

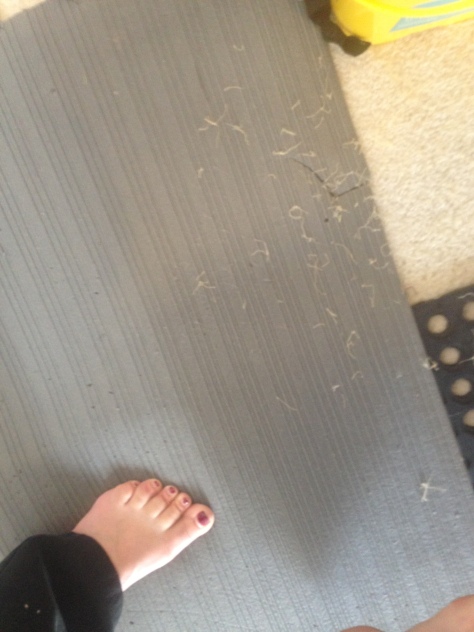
There was only the evidence below…

mess on the floor afterwards

mess on the floor afterwards

I would not recommend this as an option if your needle wasn’t sharp or if your backing is batik. You COULD use it, but often a dull needle will poke holes through the fabric on back and you may be able to hide the evidence of the crime above, but the tale will be told below! With batiks, the weave of the fabric is so tight, this often happens even with a sharp needle. Check your backing carefully to see if this IS an option, if you find yourself in a position such as mine.

I hope this has helped out any of my quilty friends with ‘mistakes’ that occur. Happy quilting – may your errors be small!